How do I transfer a license to a different user?
Scenarios
- You get a new employee, and another one leaves. You would need/want to transfer the old users license to the new user.
- A user's email address is changed.
Transfer the previous user's Data?
If your new user will be taking over the Opportunities, Contacts and Companies of the previous user, it is easiest to replace the previous user's data with the new use, name, e-mail, etc. Those steps are below.
Note that Reports and Templates' files are saved to each user's PC. You can see details in this KnowledgeBase Article.
If you prefer to delete the current employee and add the new one, you will probably want to reassign all the previous user's Opportunities, Contacts and Companies.
BEFORE deleting the user, we recommend contacting Support on how to find and reassign that data, and a few complications.
Solutions
Step 1: Switch The License
- A Prophet Administrator will sign-in to the Prophet Admin web page
Avidian Hosted Users: https://www.prophetondemand.com
Company Hosted Users: Navigate to the requisite URL specified by your IT department. - On the left hand side, click ‘User Management’
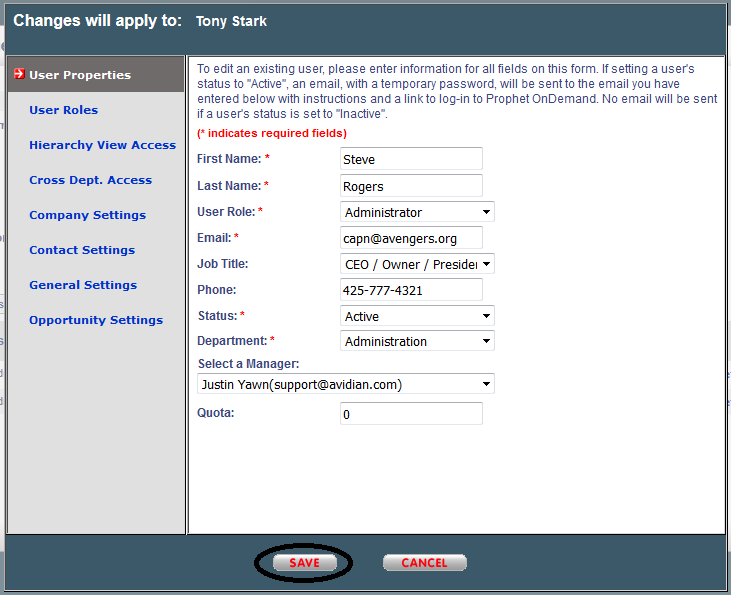
- Click ‘Edit’ by the name of the account you no longer need
- Change the fields to the new user’s information then click ‘SAVE’.
- Logout of the Admin Panel by clicking ‘Logout’ at the top
- On the Login page, click the ‘Forgot your password?’, enter the updated users email, and click 'Submit'
- Check the new users email and reset his password with the link provided.
Step 2: Install Prophet for the new user.
- If the new user does not want all their Outlook contacts to be brought into Prophet, in Outlook > Contacts, right-click the Contacts folder and create a new folder, like Prophet Contacts John.
- Download the installation.
- If the user is not a Windows Administrator on their PC, IT will need to run the installation.
New: Avidian has an installation for users who are not Windows Administrators.
Please see this KnowledgeBase Article for details.
- If IT ran the installation, once the user is logged into Windows normally, they'll run C:\Program Files\Avidian Technologies\Prophet\ConfigureProphetClient.exe and restart Outlook.
- If when running the full installation, you get a window that says that Prophet is "up to date", that means that Prophet is already installed. In that case, the user only needs to run ConfigureProphetClient.exe as noted in the previous step.
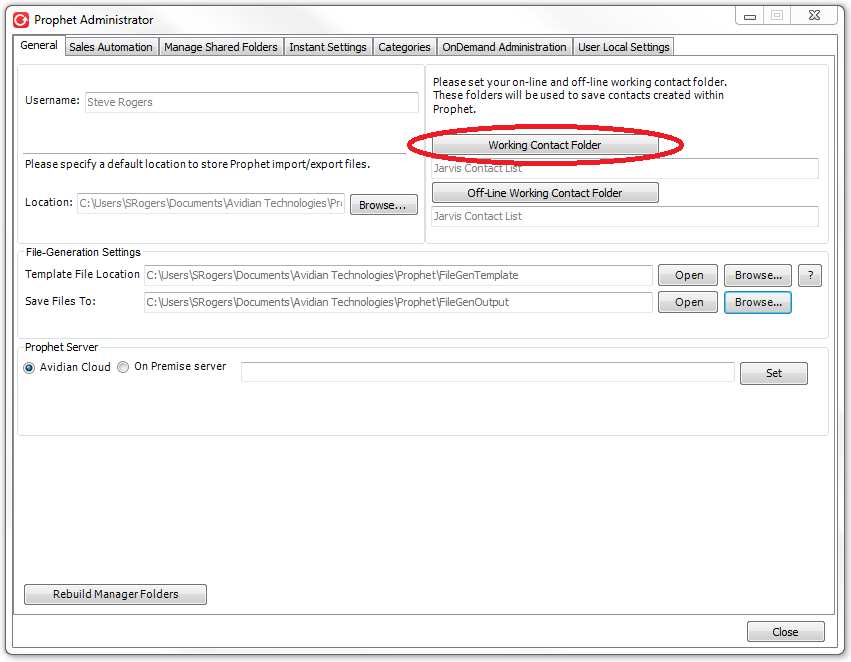
Step 3: Set the 'Working Contact' Folder
- Click the ‘Working Contact Folder’ button in the top right of the ‘Prophet Administrator’ window.
- Click the ‘Refresh’ button
- Check the box next to the folder you would like Prophet to store copies of contact records in, then click ‘OK’
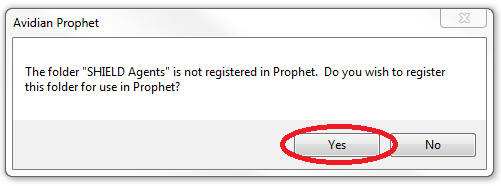
- Click ‘Yes’ to the first prompt asking if you would like to register the folder with Prophet.
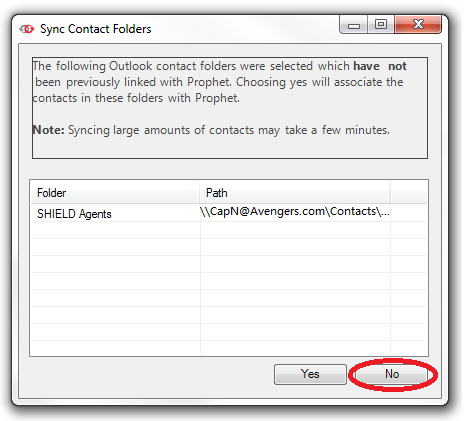
- Click ‘Yes’ to the second prompt asking if you would like to sync the folder with Prophet. Do not Synchronize if using a shared contacts folder.
- Click the ‘Off-Line Working Contact Folder’ button in the top right of the ‘Prophet Administrator’ window.
- Check the box next to the folder you would like Prophet to store contacts in while it is operating in Offline mode and click ‘OK’.
- If you are asked to register the folder, click ‘Yes’.
- If you are asked to sync the folder, click ‘No’.

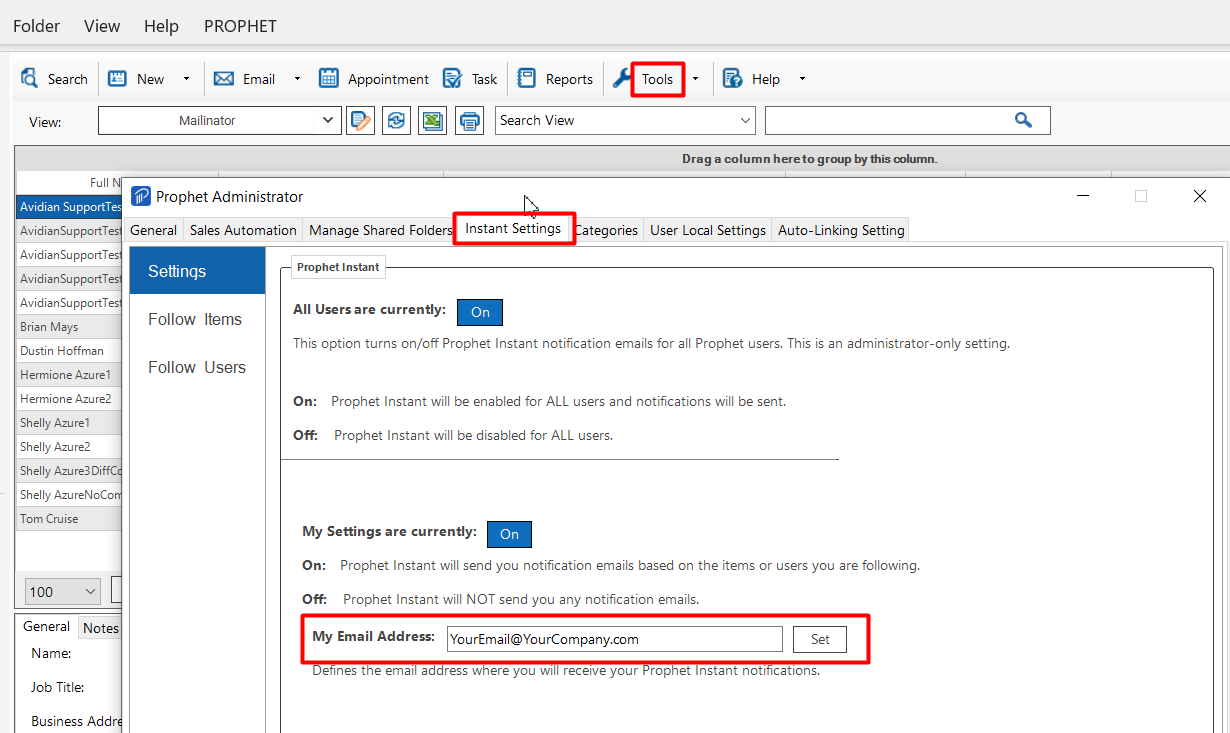
Step 4. Update Prophet Instant Email
- Click Prophet's Tools button to open Prophet Administrator.
- Click the Instant Settings tab.
- In the field for "My Email Address", put in your email. Note that it can be different than your Prophet login, but most people use their main email.
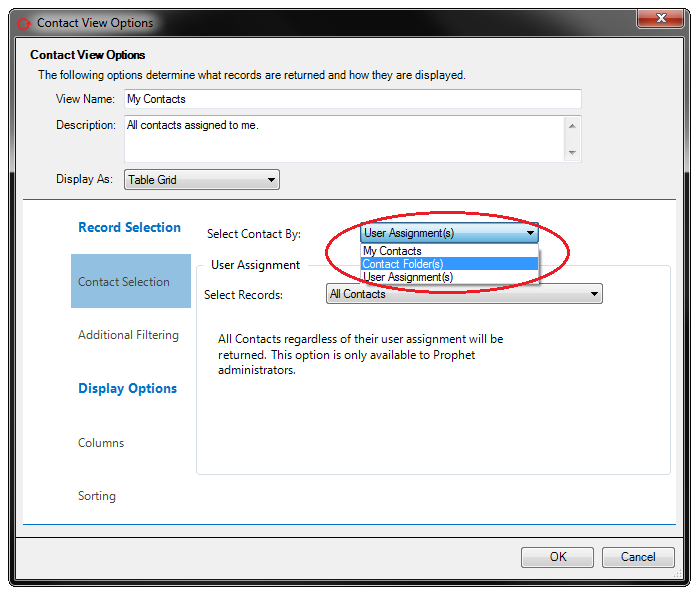
Step 5: Exclude the old Contacts folder(s).
- Click the ‘Edit View’ button in the Prophet toolbar
- In the ‘Contact View Options’ window that displays, click the drop-down menu next to ‘Select Contact By:’ and choose ‘Contact Folder(s)’ if it is not chosen already.
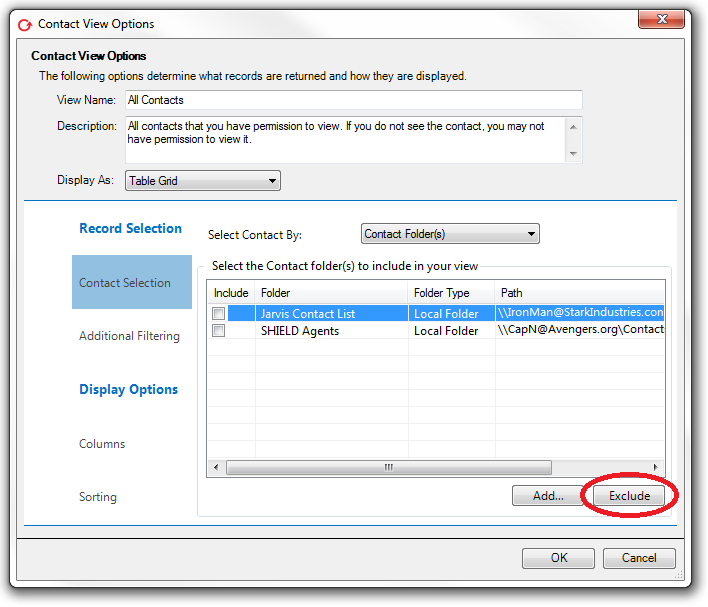
- Click on the name of any folder that you see listed in this window that are associated with the pervious user, it will become highlighted in blue. Then click the ‘Exclude’ button.
- Click ‘Yes’ when prompted for confirmation.
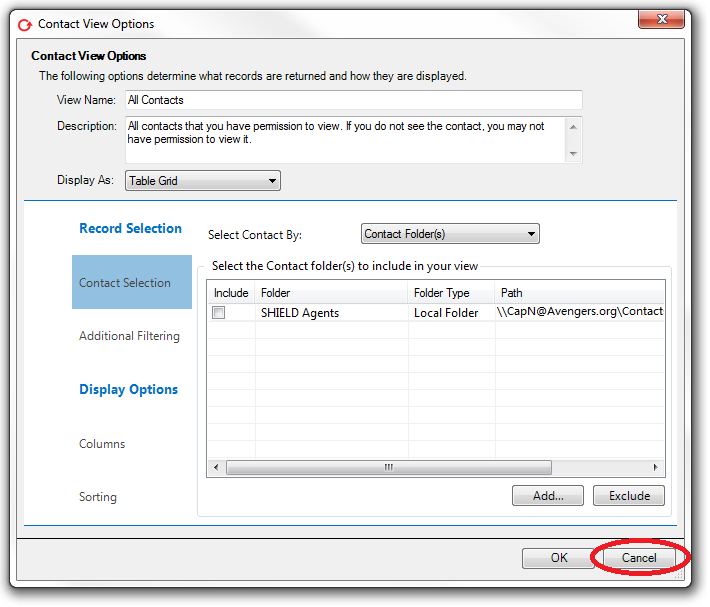
- There may be more than one of the old user’s folders that are registered in Prophet, repeat the above steps until only the folders listed are the ones associated with the current user, then click ‘Cancel’.

The Prophet client has now been configured to utilize the new user’s file paths and contact folders.
Support
If you have any trouble going through the steps or would like help, please call Avidian Prophet Technical Support at 855-284-3426 x2.
Or you can email Support@Avidian.com aka Support@Avidian.Kayako.com.
Or you can create a Support ticket (Conversation) here.
Jian Fu
Comments